Posts tagged Halloween
Halloween 2020 Costume Reveal :: Crow, Baby Shark & Powerline Costumes
Anna Osgoodby Life & Biz :: Halloween 2020 Costume Reveal :: Crow, Baby Shark & Powerline Costumes | DIY Halloween Costumes

This post contains affiliate links for your convenience which means if you purchase something I recommend I may receive a commission at no additional cost to you.

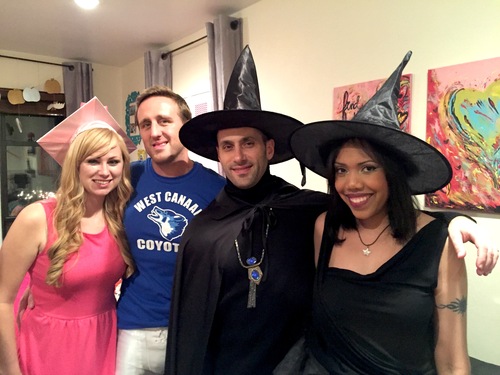
Halloween this year may have been different, but it’s our favorite holiday so we weren’t going to let it stop us from dressing up! In case you missed it, I also did a post on our house decor too so you know we’re serious about Halloween over here.

Anna Osgoodby Life & Biz :: Halloween 2020 Costume Reveal :: Crow, Baby Shark & Powerline Costumes | DIY Halloween Costumes

Feather Shawl: Amazon | Black Gloves: Similar | Mask: Spirit Halloween | Dog Shark Costume: Similar

This year I kept things pretty simple and dressed up as a crow. The first reason being… 2020, and crows are notoriously creepy and the second… because our house is in the flight path of crows and every night we have hundreds fly over. Back to that creepy factor! I have to say that totally freaked me out when we first moved before I realized it happened pretty much every night. Usually I’m a big DIYer when it comes to Halloween but this year I just bought a few items to complete my costume to keep it easy.

Anna Osgoodby Life & Biz :: Halloween 2020 Costume Reveal :: Crow, Baby Shark & Powerline Costumes | DIY Halloween Costumes

Body Suit: Similar | Prop mic: Amazon | Goofy nose: Amazon | Dog Ears: Similar

Evan on the other hand, went a little further than I did. He also LOVES Halloween and always dresses up for work too. This year he dressed up as Powerline from The Goofy Movie! For his, he bought this ridiculous bodysuit and then we created an iron-on logo with my Cricut.

Anna Osgoodby Life & Biz :: Halloween 2020 Costume Reveal :: Crow, Baby Shark & Powerline Costumes | DIY Halloween Costumes

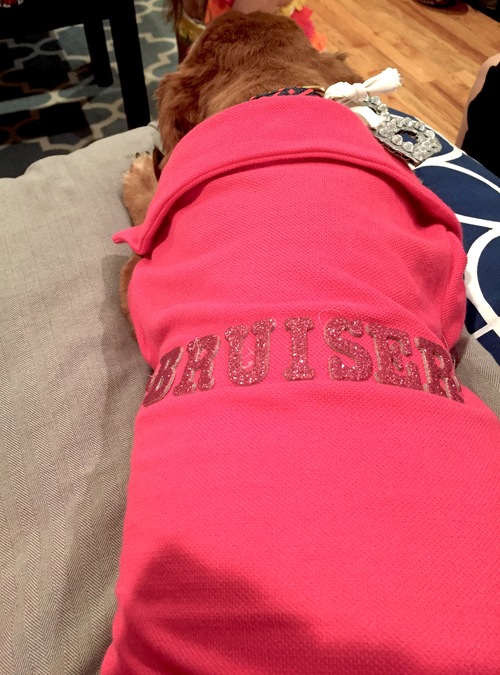
Then for Benji’s first Halloween, he dressed up as a Baby Benj Shark! I can’t say he loved taking pics for me but he didn’t mind the costume too much!

Anna Osgoodby Life & Biz :: Halloween 2020 Costume Reveal :: Crow, Baby Shark & Powerline Costumes | DIY Halloween Costumes

Then I saved the cutest for last… Little Squish as a little skeleton! It was also his first Halloween and he definitely won the cuteness award!

Anna Osgoodby Life & Biz :: Halloween 2020 Costume Reveal :: Crow, Baby Shark & Powerline Costumes | DIY Halloween Costumes

I hope you guys had a great Halloween too!

Happy Halloween from the Farm
Anna Osgoodby Life + Design :: Happy Halloween from the Farm

Halloween has always been a favorite of mine since I was a kid. I'll skip the scary movies and haunted house but I am alllll about all the pumpkin patch, the costumes and, duh, the candy! 🎃🍭

Anna Osgoodby Life + Design :: Happy Halloween from the Farm

I was really excited for this Halloween too because I actually had a porch that I got to decorate plus we actually get trick or treaters here! Trick or treating isn't really a thing in the city, so it's been a hot minute since I've actually had kids knocking on my door.

Anna Osgoodby Life + Design :: Happy Halloween from the Farm

This year, I decided to use my move back to Washington as inspiration for my costume and take it back to the farm!I had so much fun with this one and it was pretty easy! Here's what you'll need if you want to recreate the look.

Supplies:

  • Tulle skirt as a base -- mine is from Space 46 Boutique (You could also make your own)
  • 1 yard of white tulle
  • 1/2 yard of black felt
  • 1 sheet of white and pink felt
  • Bell
  • Headband
  • White t-shirt
  • 1 roll of ribbon of your choice
  • faux foilage of your choice (I chose sunflowers and leaves)
  • Hot glue gun 
  • Sewing needle and transparent thread
Anna Osgoodby Life + Design :: Happy Halloween from the Farm

The first part of the costume I worked on was the headband, which was the most labor intensive part (which still isn't that bad!). I started with an old black headband I used the felt to start on the ears. I doubled up the felt so when wrapped around the headband and folded together they formed ears. Start with the white felt, and then you can use transparent thread to sew both ends together. You don't need to do any complicated stitching, just a simple mending job. Once you have your bases set, cut spots out of the black felt and add those on top followed by pink felt for the inside of the ears. Once your ears are complete, if you please, you can add some faux foilage like I did with a glue gun.

Anna Osgoodby Life + Design :: Happy Halloween from the Farm

The next step is the shirt! I went with an off-the-shoulder look, but you could totally just use a t-shirt of v-neck as is. If you'd like an off the shoulder look then you just need to cut an oval shape off of the top from each side of the shirt. Need up, cut out spots out of the black felt and add them to your t-shirt with hot glue. You could sew these spots, but hot glue worked great and it only has to stick for one maybe two nights anyways right?! If you use a glue gun, I suggest putting a piece of cardboard inside the shirt so you don't glue it together. Then I finished off the top by tying a ribbon on each sleeve.

For the skirt, I used a pink tulle skirt I had as a base and then I added a white tulle apron to the front that I added spots on. For this, I got 1 yard of tulle and cut it into long strips. Double it up to the length you want it to be and tie a little knot at the top. Then take your ribbon, wrap it around your waist and cut the length that allows you to tie it in a bow. Once your ribbon is cut, find the center and hot glue each of your tulle strips in the center. Then you can cut some more black spots and lightly hot glue those to the front of the tulle. To finish off the skirt, I took some more of my faux foliage and glued it to the corner of the front.

Last but not least, I took my bell and added it to the same ribbon used throughout for my necklace. I also had a little extra so I made a little leaf bracelet as well.

Anna Osgoodby Life + Design :: Happy Halloween from the Farm

And wa-lah, Halloween costume! Of course, no cow is complete without a baby cow! That's right, Scoots got in on the action too! I swear he liked his costume more than he looks like he did 😂 He definitely liked all the trick or treaters though, that's for sure! All and all, it was a great Halloween! Hope everyone had a fun holiday as well!

Boos and Booze
Anna Osgoodby Life + Design :: DIY Halloween Costume Elle Woods

Halloween has always been one of my favorite holidays! I’m not big on scary movies or haunted houses, but I do love all of the costumes, treats and decor! Hello pumpkins! 

After talking with some of my friends about the holiday and realizing no one really had set plans yet I decided it was time to plan a Halloween party for some of my closest friends!

Thanks to Pinterest I found so many wonderful decor ideas that I adapted with a little Anna flare!

I decided my color themes, in addition to the traditional orange and black, were going to be silver and gold. Instead of carving pumpkins I decided to take my metallic paints to my mini pumpkins and then I added some sparkle gems with a hot glue gun {All found at Michaels}.

I love how these little cuties turned out and since I didn’t carve them I’m hoping they can stick around into the Thanksgiving season.

Next up, I made some cute little toilet paper bats. These little guys were pretty easy to make and just involved some toilet paper/paper towel rolls, some paint and paper. I picked up a variety of different sheets of glitter paper {also from Michaels} and finished them off with a little more silver and gold paint.

After some of my key decorations were made it was time to get going on my costume! This year I decided to play a tribute to my favorite movie Legally Blonde and dress up as Elle Woods and then dress up Scooter as Bruiser Woods! Compared to some of my past DIY costumes, this one was actually pretty simple. 

If you’ve seen Legally Blonde you know that Elle is very pink! Of course dressing in all pink isn’t really enough to be distinguished as the character so I took on a few props. First, I ordered a pink graduation cap, which were legit so I’m totally jealous of what schools actually graduate in pink! Once I got my cap, I got some pink glitter letters and spelled out Harvard Class of 2004 on the cap and added some extra bling and a bow for a little something extra!

Other than my cap, I wore a pink dress and pink wedges — both of which I already owned. I finished off the look with a Harvard University print-out that I made pink and glued to a folder and then a pink cozie for my drinks of the night. 

For Scoots, I ordered a pink doggie polo and used the same letters to spell out Bruiser and then I made a little “B” tag for his collar that I also added a little bling too. 

Pretty easy and I think it turned out pretty good!

Now onto the rest of my party! I styled my bar cart with a print-out I made, some festive orange cupcakes, fun skull and spooky paper straws, and some Happy Hallo-weiner napkins my Aunt Di sent me last year.

I only added some red wine into the decanter to kind of look like blood.

On the bar, I hung a silver and gold pumpkin banner and put some of my pumpkins on display.

Now, no Halloween party post would be complete without a look at my guests’ costumes though! So here you go!

I hope you all had as much fun on Halloween as I did!